I have just installed CentOS 6.3 64-bit (minimal) in Virtual Box. This is how I installed CentOS in Virtual Box. Hope this helps.
[Update: The updated version of this article with screenshots for CentOS 6.7 can be found here.]
Requirements:
- CentOS 64-bit ISO : Download Link (~330 MB)
- Virtual Box : Download Link (~90 MB)
- Atleast 8 GB -of free disk space
Installation Procedure:
First, thing you need to do is to set up your Virtual Box. Go ahead download and install Virtual Box (the download link is given above in the requirements).
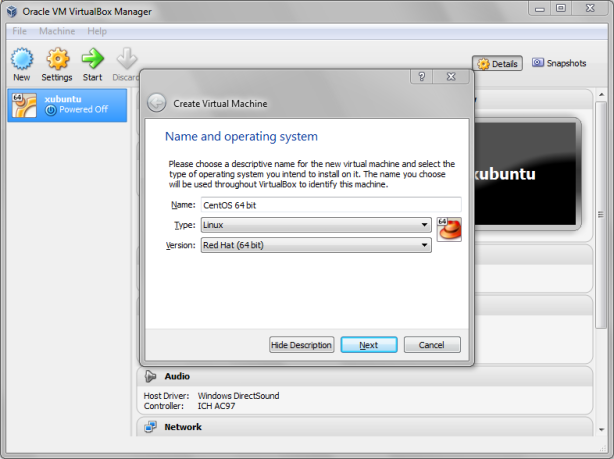
Press “New“, Type as “CentOS 64 bit” or anything you want. Set the type as “Linux“, Version as “Red Hat 64 bit“. And press “Next”.
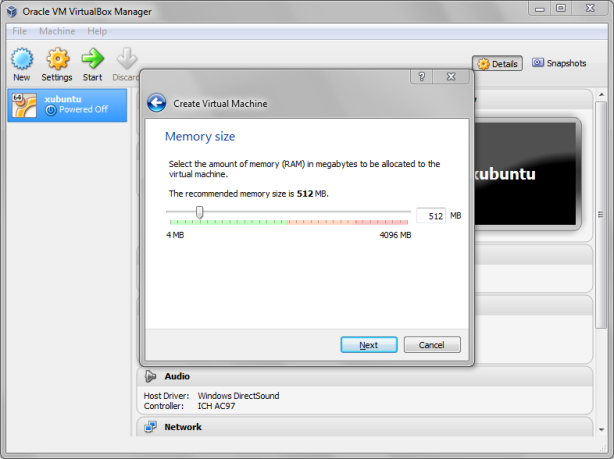
Allocate “Memory ” to 512 Mb or 1024 MB . You can increase this value according to requirements. And Press”Next“.
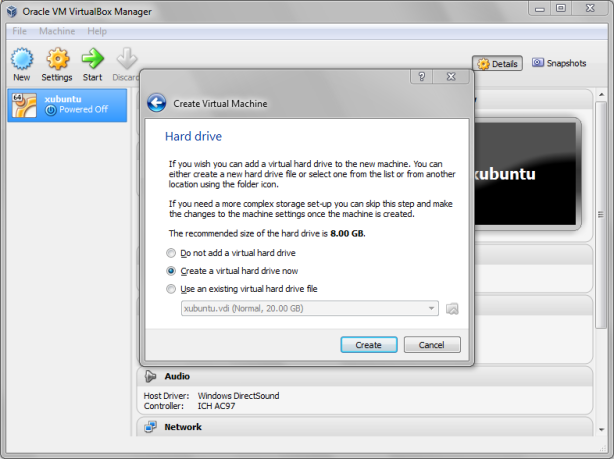
Then select “Create a virtual Hardisk Now” and press “Create“.
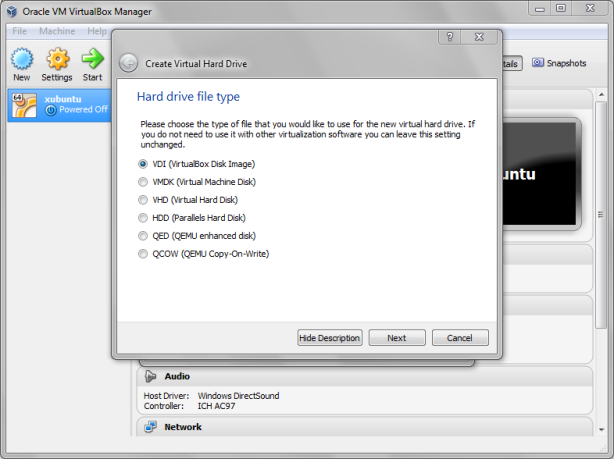
Then choose “VDI” which is the first option, and press “Next“.
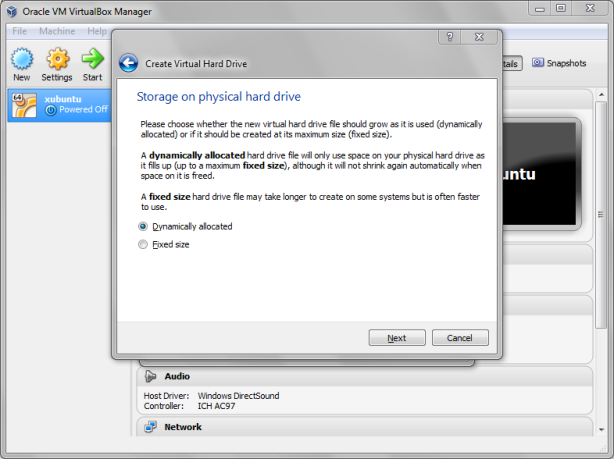
Then choose “Dynamically allocated”
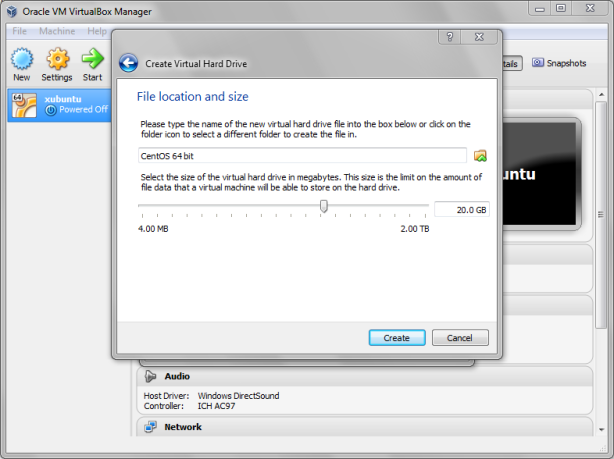
Choose the amount of hard disk space you want to allocate for your CentOS system. Select atleast 8Gb-10GB . I have allocated 20 GB. And press “Create“.
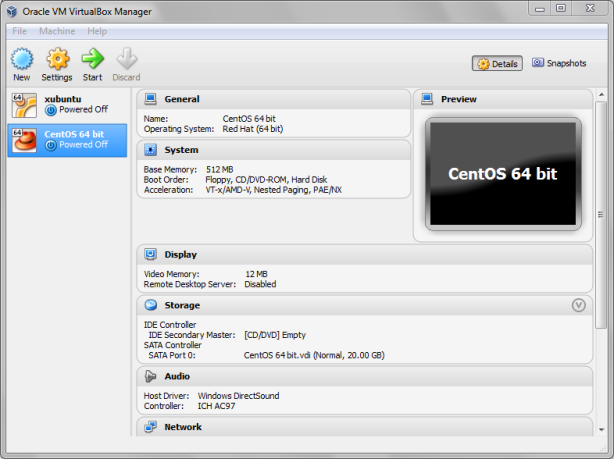
You would see the Virtual Box Home Screen. Now Press on “Start“.
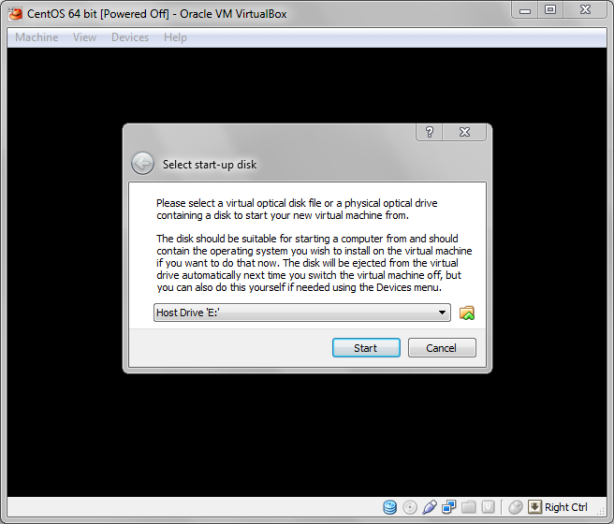
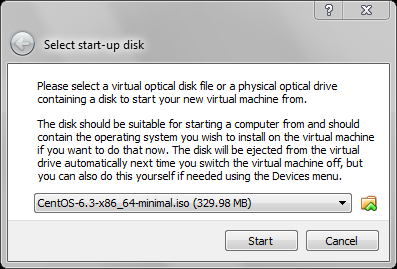
Then press the small folder icon and choose the CentOS ISO file you have downloaded earlier. And then press “Start“.
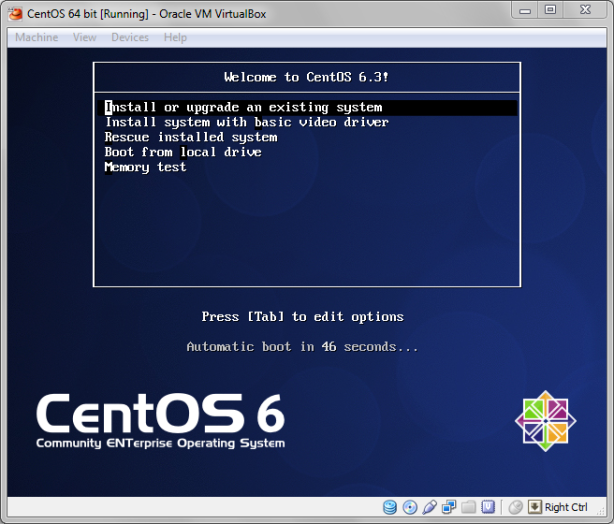
Wait for a few seconds and you will see the CentOS boot menu. Now, select the first option “Install or upgrade an existing system“. And press “Enter” in your keyboard.
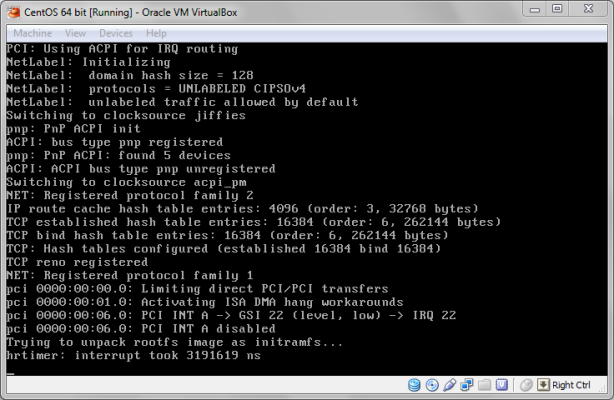
Now , it will take a few seconds to load.
[Note: To scroll through different options, you can either use the Arrow keys in your keyboard or the TAB key to move through different options . You may also use SPACE bar in your keyboard or ENTER key to make selections]
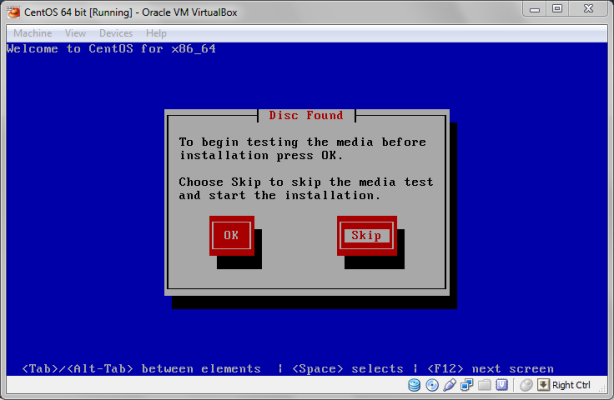
Now, you will probably get a message box saying “Disk Found” and if you want to verify the contents in the CD. Press “Skip” as you are installing from an ISO file. If you need, you can press “OK” and verify the contents but it might take a while.
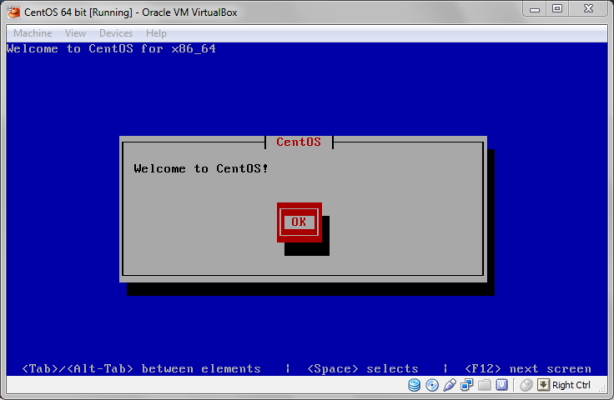
You would see a message “Welcome to CentOS” and then press “OK“.
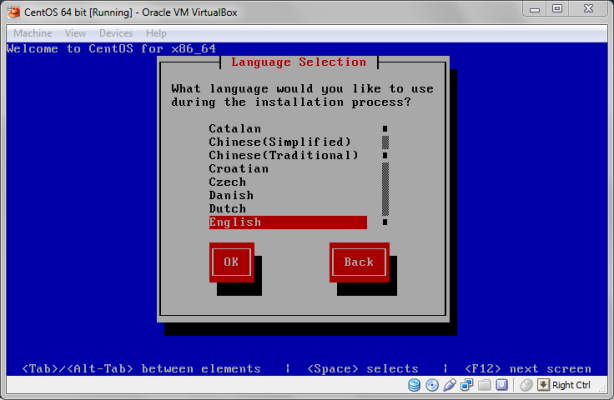
Select the language and press “OK“.
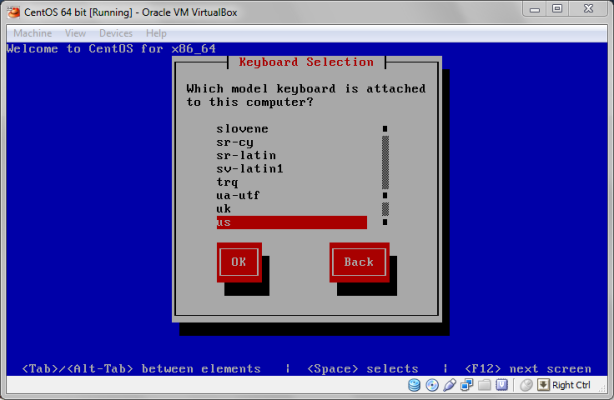
Select the model of the keyboard or just leave it to the default value. then press “OK“.
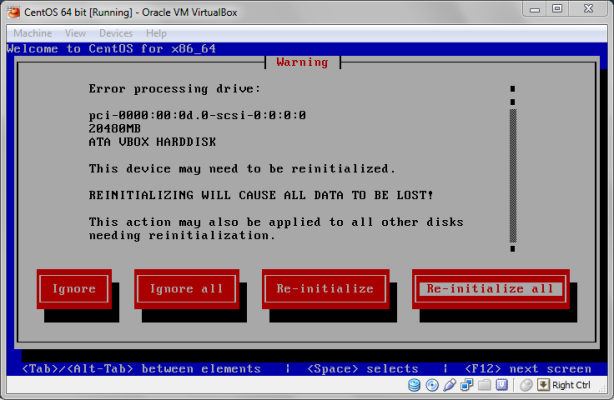
If you get a “Warning Message” such as the one below, just choose “Re-initialize all“.
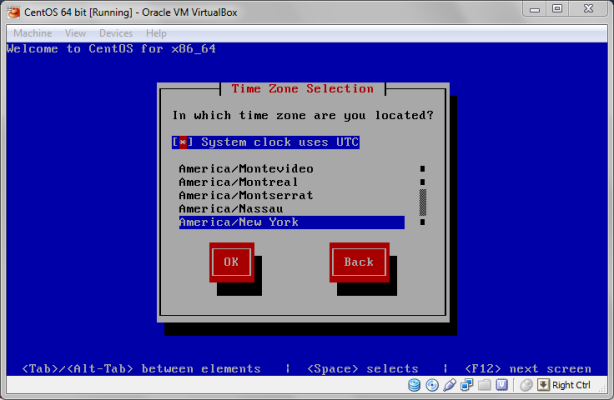
Then select your time zone and (Press TAB) and then “OK“.
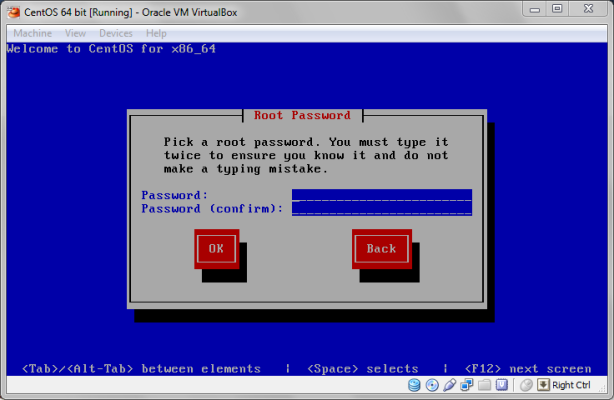
Now, you will need to enter a password. This will be the password for the root user (or Administrator password). Then select “OK“. {Remember you can use the arrow keys or TAB to move through different fields or options in the screen}.
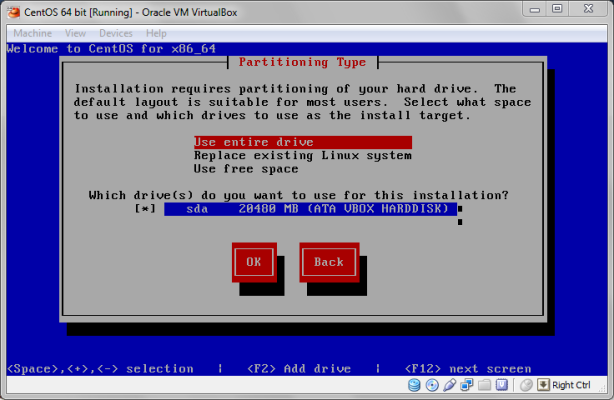
Now, select “Use entire drive” and then press “OK“.
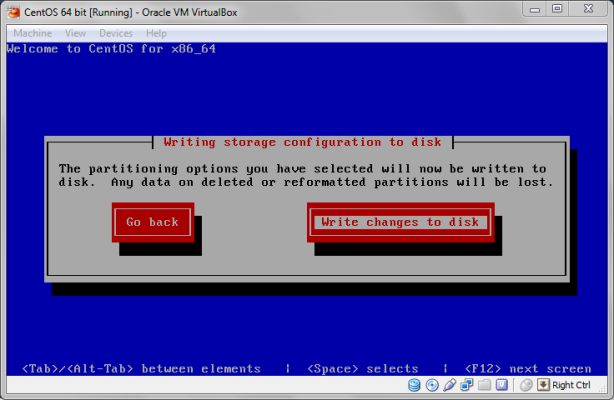
Now, press “Write changes to disk“.
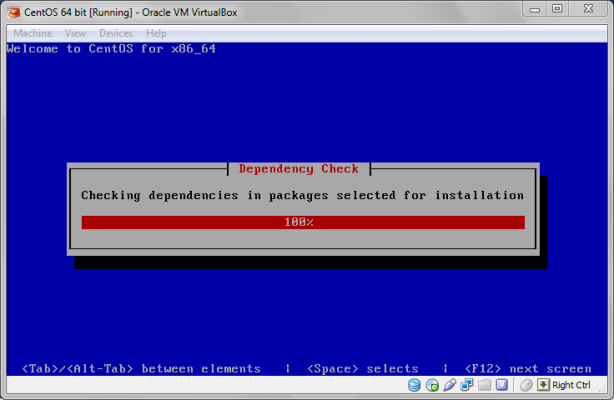
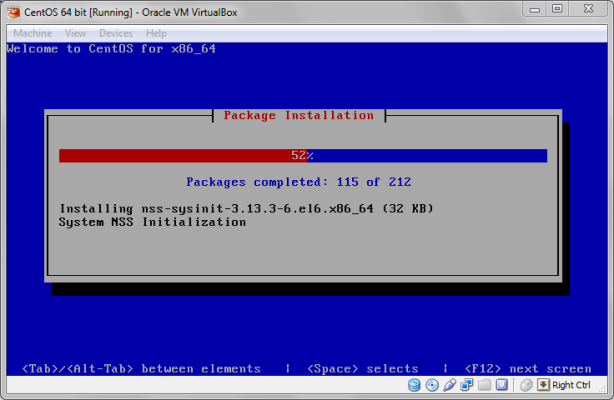
Now, it will begin installing CentOS. It might take a while for it to complete.
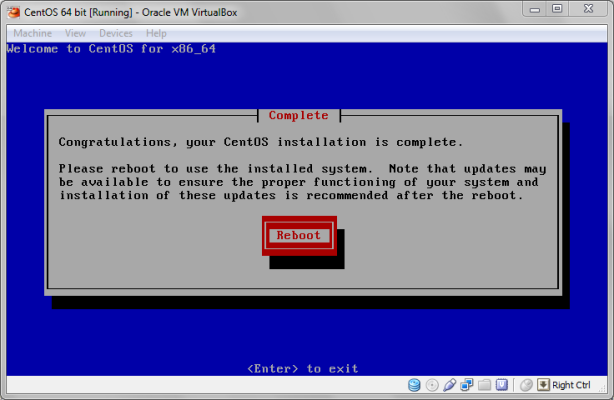
After, it is done installing , you will see a message saying “Congratulations, your CentOS installation is complete“. Select “Reboot” and hit ENTER.
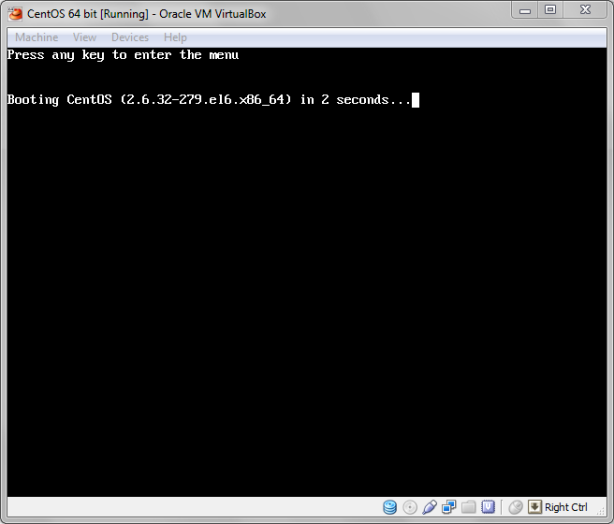
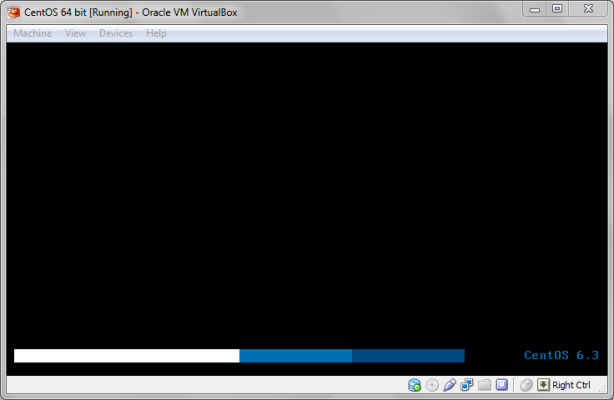
It will reboot now, and you will see the CentOS booting screen.
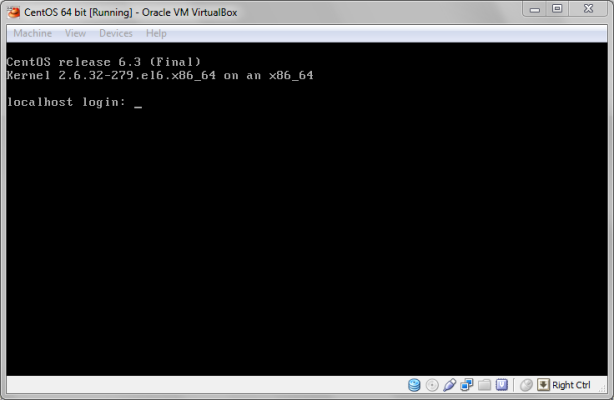
Now, you will see the login prompt as shown in the picture below. Now, Type the login as “root” and password as the password you entered during the setup.
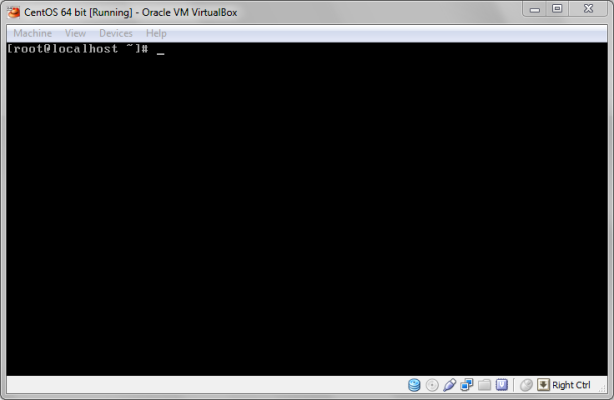
After successful login you will see a prompt as shown below with # symbol at the end.
And voilà ! You have successfully installed CentOS in your Virtual Box.
This is a minimal mode CentOS and so many application packages are not installed. You will also have to configure the network to access the internet.
[UPDATE: To configure network in CentOS, I have made a detailed guide with screenshots, you can find it here.]
If you have any sort of queries on regarding this installation, just leave a comment and will get back at you. Don’t forget to follow my blog to get future updates! ![]()
ΞXΤЯ3МΞ
I have some troubles installing… When I get to the point where I need to choose CentOS iso file that I have downloaded, I select it and it comes up with an error..
Failed to open the CD/DVD image D:\myname\Downloads\CentOS-6.3-x86_64-minimal.iso.
Could not get the storage format of the medium ‘D:\myname\Downloads\CentOS-6.3-x86_64-minimal.iso’ (VERR_NOT_SUPPORTED).
Result Code: VBOX_E_IPRT_ERROR (0x80BB0005)
Component: Medium
Interface: IMedium {29989373-b111-4654-8493-2e1176cba890}
Callee: IVirtualBox {3b2f08eb-b810-4715-bee0-bb06b9880ad2}
Callee RC: VBOX_E_OBJECT_NOT_FOUND (0x80BB0001)
Can anyone help?
Thanks in advance.
@John Doe , Hey there. There are couple of users who had this similar issue before, most of them was due to corrupted downloads of the CentOS ISO file.
-> Try re-downloading the CentOS ISO image file and mounting it again. It should be fine.
Even after this step if you face any sort of issues. Please post the error message here and I would be glad to help you out.
Thank You
Hey, thanks for the help. I passed that step, but there’s a problem on the next one.
When I press “Install or upgrade an existing system”, the process starts off but than stops and says:
This kernel requires an x86-64 CPU, but only detected an i686 CPU.
Unable to boot – please use a kernel appropriate for your CPU.
Sorry for all the hustle, I’m a bit of an amateur. 🙂
@John Doe, Dont worry. There are couple of things we need to check before installing an OS in virtual box such as :
1. Check if your processor support Virtualization.
I have written a post about how to find it out if you have an Intel processor.
You can find it here at : https://extr3metech.wordpress.com/2012/10/27/how-to-check-if-your-processor-supports-virtualization/
2. Make sure that Virtualization is enabled in your BIOS settings.
When you boot your computer, you will see the BIOS screen or the vendor screen, at that point of time, you need to press ESC (or some key such as F10 depending on what is shown in your BIOS). This will then take you to the BIOS settings. Now, BROWSE around and you would see a field such as to enable or disable “Virtualization Technology” or something like “Enable VT-x” or “Enable AMD-V” and change it to “Enabled”. Restart your computer.
(If you have difficulty finding out this, please post your BIOS name and your processor model and I will check it out for you.)
3. Find out the type of OS you have installed , whether it is 32-bit or 64-bit.
Press the “Windows” key(located next to the left CTRL key) and the “Pause Break” (located mostly near the SCROLL LOCK key in your keyboard) together. Now, you will see a field named “System Type” .
-> If the “System type” is “64-bit”, and you have downloaded the CentOS 64-bit version which I have mentioned in my blog post, then its fine.
-> If it says 32-bit, then you need to download the 32bit of the CentOS file which can be downloaded from :
http://centosmirror.go4hosting.in/centos/6.3/isos/i386/CentOS-6.3-i386-minimal.iso
Hope this helps out. Please , leave a comment if you need any sort of help. I will be glad to help you out!
Thank You so much for visiting my blog!
It turns out my pc doesn’t support virtualization…
Anyway, thanks for the help.
Your welcome!
My Dell XPS 2720 doesn’t support virtualization and I have 64bit Windows 8.1 Pro installed. Can I only install 32 bit CentOS in VirtualBox (I can’t see the 64 bit options in Virtual box)?
For the benefit of anybody with a Dell XPS 27 all in one (mine is an XPS 2720) you have to turn OFF Virtualization in BIOS to actually turn it on (it’s the wrong way around) then install Virtual box again and you will see the 64 bit OS options in Virtual Box drop down.
Thanks very much. I followed your tutorial successfully. Can you make a another one showing how to configure network and any other basic settings.
Thanks again.
@dannyphan, Glad that you could follow it. I will be making a post on How to configure the network soon.
Thanks very much.
I have created a post on changing the hostname in CentOS, you can find in my blog or you can try the link https://extr3metech.wordpress.com/2012/12/12/changing-hostname-in-centos-red-hat-linux/
Hope this helps!
Yes, a post about how to configure the network would be most helpful. Thank you for taking the time to add screenshots.
Hey Peter, your welcome! I will add a post on configuring the network soon. You can follow my blog to get the update when I add the post.
Thanks for visiting my blog !
@Peter J. Hart, I have created a guide on how to configure the network for centOS, you can find it at :
Thank You
Thank you.
Hi
I managed to install this minimal centos but it does not have cc or gcc compilers. I need to work on C and perl programs. Can you tell me how to make this work in this installation?
Or is there any direct link to download the complete CentOS 6.3 which has all these components?
Its kind of urgent. plz respond soon.
Sam
You can install the development tools package. You can do so by typing the following in your terminal or command line :
yum groupinstall ‘Development Tools’
This will install all the packages you need to do your development. Feel free to leave any comments if you need any help. Hope this helps!
Thank you 🙂
@rikacomet, Your Welcome! 🙂
Regards
ΞXΤЯ3МΞ
thank you for this tutorial.
nice one good job.
Hey Divyesh, your welcome ! thank you for visiting my blog! 🙂
Loved this easy to follow installation guide! The screen shots were especially helpful. Thank you for sharing this.
@Penny Caine , Your Welcome! And thank you for visiting my blog!
Thanks so much I installed the centOS successfully but have not been able to find a guide on how to configure the network so I can start downloading from YUM or access internet. I noticed you are posting a guide soon, please let me know if you have a basic guide that I can follow.
Amin
@Amin, Thank you for visiting my blog. I will be posting an article this week. So, stay tuned!
I have followed the steps you mentioned. Please post the next part for the configuration of net work. Because if I type command # yum install httpd. Its not working.
I have also search it on google http://www.virtualbox.org/manual/ch06.html , but couldn’t help me out.
I am using windows 7 as host OS. Please help me.
@Gunwant, One way for configuring the network, open your virtual box settings and go to the “Network” tab and choose the option “Attached to” to “Bridged Adapter”.
Then boot your centos virtual machine, and type the following in your terminal:
# vi /etc/sysconfig/network-scripts/ifcfg-eth0
And then change the file to the following:
DEVICE=”eth0″
BOOTPROTO=”dhcp”
ONBOOT=”yes
And save the file and exit. After that you need to restart the network service and you can do that by typing the following in the terminal:
# service network restart
Now, you can check your command
# yum install httpd
Now, it should work. I will be posting a detailed article soon for my readers soon. Thank you for visiting my blog. Feel free to ask any questions in the comments section. Have fun!
Thank you so much for this quick config! So useful.
@Joe, Your welcome!
@Gunwant, I have also created a detailed guide on configuring network (both dynamic and static method). You can find it here:
Regards,
ΞXΤЯ3МΞ
thak you very much bro…
but i want to know how can i change the graphical interface?
@eranjaya, your welcome! We have installed the CentOS minimal version which does not have the graphical interface but we can add the graphical interface. To add the graphical interface, type the following in your terminal:
yum groupinstall basic-desktop desktop-platform x11 fonts
(OR)
yum groupinstall “Desktop” “Desktop Platform” “X Window System” “Fonts”
I hope this helps and thanks a ton for visiting my blog!
ΞXΤЯ3МΞ
Hi,
can you please reply me how to install CentOS 6.3 in text mode on two different storages.
On first storage I need install boot & on second storage I need all others files.
Thanks.
@White8, You mean you need two partitions , one for the os itself and the another as a secondary storage? And you want to add a secondary device after installing Centos using a single partition?
Thanks. No real issues that I could not resolve in the minimal installation. The only issue I’m running into is the password I setup for root. I probably fat fingered it in the installation, because now the system is not recognizing the password.
@Sandra Claude, If you don’t remember the password, you can this following hack to reset the password.
1. Restart your OS and tap on any any key during the boot countdown.
2. Press e when you see the GRUB menu.
2. Now from this menu , select kernel /vmlinuz-… line and press e . Now you will see the boot option which has a long line. At the end of that line put a space and type “single” (without the quotes) and hit Enter. Now press of ‘b’ key to boot this configuration.
3. Now, you will boot into the single user mode. You can now change the password by typing the following in the terminal:
passwd
Now enter your new password. You will be prompted to enter the password twice to confirm.
4.Now, you have created a new password. All you have to do is restart the computer to the normal mode. You can do that by typing the following in the terminal:
reboot
Hope this helps!
Regards
ΞXΤЯ3МΞ
Thanks for this pretty clear how-to. I’m working through creating a minimal system for virtualization — basically running a bunch of VM’s each hosting a site — and found your write very helpful.
@Quanta, Your welcome ! Thank you for visiting my blog! You can also subscribe to my blog to get the latest updates.
With CentOS 6.4, if you allocate 1 GB of RAM when creating VM, you’ll see a pleasant surprise. A graphical installer appears, which makes installation much easier.
@CentOS Fan, Thank you very much for this info. And thanks for visiting my blog! 😀
Thanks for a great guide! I’m having some issues with the Virtualbox guest additions – whenever I install updates for CentOS, it seems that the guest additions services no longer start automatically, and I have to reinstall them to make it work. Any ideas how to fix this issue?
@Tausen, Your Welcome! I have seen a thread similar to the problem that you are having, you can find the thread at : https://forums.virtualbox.org/viewtopic.php?f=3&t=49283
Hope this helps!
It looks like it may be due a possible mismatch in kernel headers. Thank You for visiting my blog
ΞXΤЯ3МΞ
Great work EXTR3ME … 🙂
@Usman, Thank You!
Regards
ΞXΤЯ3МΞ
Hey! I just wanted to ask if you ever have any issues with
hackers? My last blog (wordpress) was hacked and I ended up losing many months of hard work due to no
backup. Do you have any solutions to prevent hackers?
Thank’s for this tutorial. but i can’t login in my centos. i dont know the “localhost login username”, in this tutorial i can’t see the setup for login username. can you help me to fix this..
@MWcrew, check out the below link for fixing this problem.
http://www.centos.org/docs/2/rhl-gsg-en-7.2/s1-q-and-a-bootlogin.html
Hope this helps!
Regards
ΞXΤЯ3МΞ
really helpful. thanks a lot for this!
@linuxnewbie , Your welcome!
Regards
ΞXΤЯ3МΞ
I follow your instructions and its done perfectly. Only i use this link to download centOS 6.4 http://centos.telecoms.bg/6.4/isos/i386/
@val10, Thats great! 🙂
Regards
ΞXΤЯ3МΞ
At the 16th image u have mentioned that if a warning click re intialize , By pressing this does remaining data in the drive will be lost ???
@Sasi, In this tutorial, we are creating and installing the OS in a virtual hard disk, so it is fine to click on the reinitialize as it will be making changes only to the virtual hard disk that you have created.
Regards
ΞXΤЯ3МΞ
@Extreme Thank you.I installed it successfully.How to do java prgms in the this?? From where can i download these packages??
hey… i wanna ask that by installing CentOS, the windows will get affected or not? By doing the above mentioned steps to install the centOS, data stored in windows will be lost or not?
@Fari, We are simply installing CentOS in a virtual hard disk which is stored as a file in your Hard Disk. This will not affect your Windows OS.
Regards
ΞXΤЯ3МΞ
The blog is precise and it helped me a lot.
Thank you
@fauny, Your Welcome!
Regards
ΞXΤЯ3МΞ
Nice Guide. Thanks!
Hi. Please, i can’t see Red hat 64bit option. Kindly help
@Ademola, By default, the option for Type selected would be Microsoft , make sure you change the Type to “Linux” and then proceed with the selection of the Version. It should ideally have Red Hat (64-bit). Hope this helps.
Regards
ΞXΤЯ3МΞ
Very useful, many thanks!
@Fernando França, Your Welcome! Thanks for visiting 🙂
Regards
ΞXΤЯ3МΞ
Thank you. These steps really helped me to install CentOS for nagios.
@Vp, Your Welcome! Glad it helped! Subscribe to get future updates!
Regards
ΞXΤЯ3МΞ