Posts Tagged ‘windows 7’

I have just installed CentOS 6.5 (minimal)  in Virtual Box on my Windows 8.1 pc. This is how I installed CentOS. Hope this helps.

[Update: The updated version of this article with screenshots for CentOS 6.7 can be found here.]

Requirements:

  1. CentOS 6.5 32-bit ISO : Download Link (~330 MB)
  2. Virtual Box : Download Link (~110 MB)
  3. Atleast 8 GB of free disk space.

Installation Procedure:

First, thing you need to  do is to set up your Virtual Box. Go ahead download and install Virtual Box (the download link is given above in the requirements).

Press “New“, Type Name as “CentOS 6.5 32 bit” or anything you want. Set the type as “Linux“, Version as “Red Hat 32 bit“. And press “Next”.

create vm

name and type of OS pic

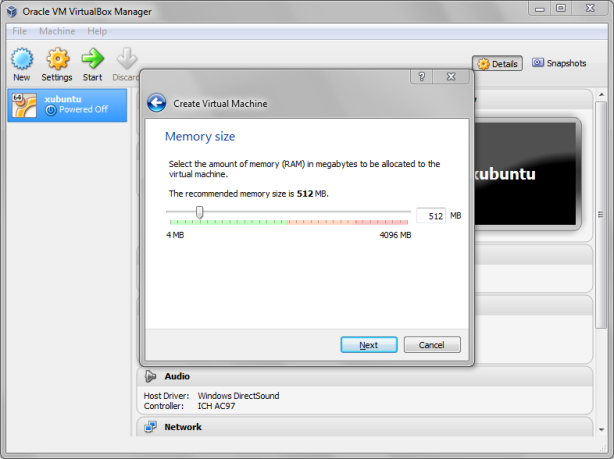
Allocate RAM to 512 MB RAM or higher , then click “Next“.

select ram size pic

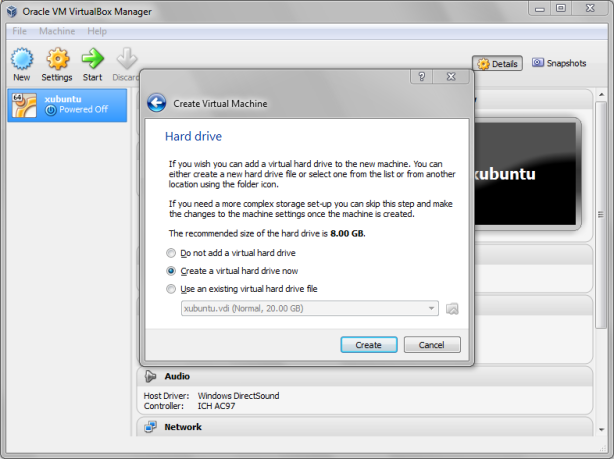
Then select the option “Create a virtual hard drive now “, then click on “Create“.

create hd pic

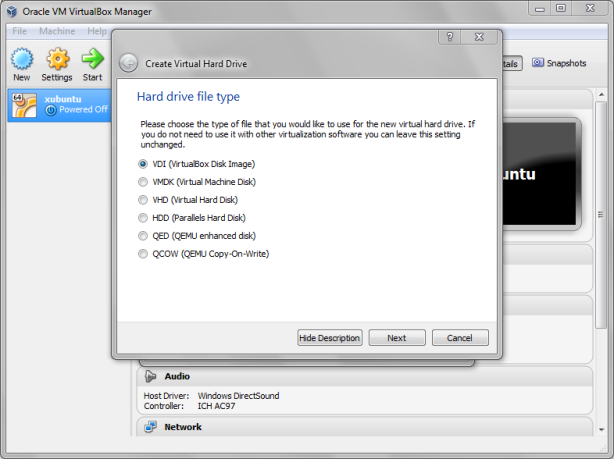
Select hard drive file type as the first option “VDI” , then click on “Next“.

hard disk type: vdi pic

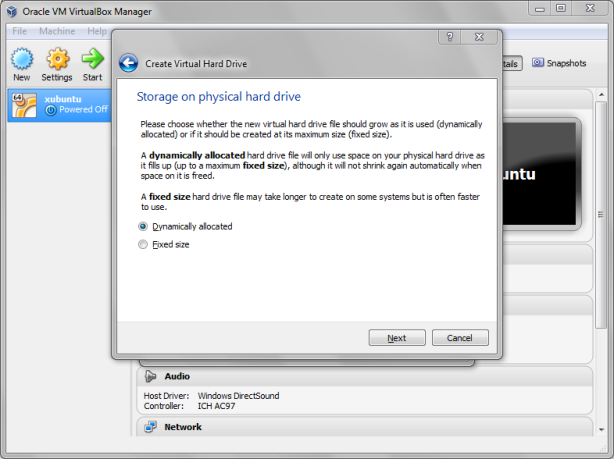
Select type as “Dynamically allocated“. Choose the amount of hard disk space you want to allocate for your CentOS system. Select atleast 8Gb-10GB or higher and then click on “Create“.

VM HD size pic

Now, you would see the home screen of the Oracle Virtual box, Click on the CentOS VM you have created and then click “Start“.

start vm

Then click on the yellow folder icon and select the ISO file that you have downloaded.

Select ISO location

Then click on “Start“.

start boot

Wait for a few seconds and you will see the CentOS boot menu. Now, select the first option “Install or upgrade an existing system“.

Boot menu picture


[Note: To scroll through different options, you can either use the Arrow keys in your keyboard or the TAB key to move through different options . You may also use SPACE bar in your keyboard or ENTER key to make selections]

Now, you will probably get a message box saying “Disk Found” and if you want to verify the contents in the CD. Press “Skip”. If you need, you can press “OK” and verify the contents but it might take a while.

Using your arrow keys, select “Skip” and then hit “Enter“.

Disk check pic

loading screen

Hit “OK“.

CentOS Welcome

Now, select the language and then use the TAB key and then select “Ok” and hit ENTER.

select language

Now, select the model of the keyboardand then select “OK“.

keyboard selection pic

If you get a “Warning Message” such as the one below, just chooseRe-initialize all“.

Re-initialize all picture

Now, select your time zone and then hit “OK“. Then select a password for your “root” (or admin account), you can use TAB keys to reach the next box, and finally select “OK” and hit ENTER.

create root password

Now, select the option “Use entire drive“, and select “OK”.

allocate hard drive picture

Now, select “Write changes to disk” and the installer should start right up.

installation picture

installation progress pic

After, it is done installing , you will see a message saying “Congratulations, your CentOS installation is complete“. Select “Reboot” and hit ENTER.

installation complete -Reboot

Now, it should boot right up.

centos bootup picture

now, type login as: root , Then hit ENTER. Then type the password and hit ENTER. You should see now be able to see the terminal window with the # symbol.

root login pic


And voilà ! You have successfully installed CentOS 6.5 in Virtual Box.

This is a minimal mode CentOS and so many application packages are not installed. You will also have to configure the network to access the internet.

[UPDATE: To configure network in CentOS 6.5 (which is the same as configuring centos 6.3), I have made a detailed guide with screenshots, you can find it here.]

If you have any sort of queries on regarding this installation, just leave a comment and will get back at you. Don’t forget to follow my blog to get future updates! :D

Regards
ΞXΤЯ3МΞ

This is a guide on how to install Zorin OS 7 (64-bit) in Virtual Box. Hope this helps!

Requirements:

  1. Zorin OS Core ISO : Download Link (~1.5GB)
  2. Virtual Box : Download Link  (~96 MB)
  3. Atleast 8 GB of free hard disk space.

Installation Procedure:

First, download and install Virtual Box in your computer using the download link mentioned above. Also, download the Zorin OS ISO to any location of your choice.

Open Virtual Box, click on “New“:

1

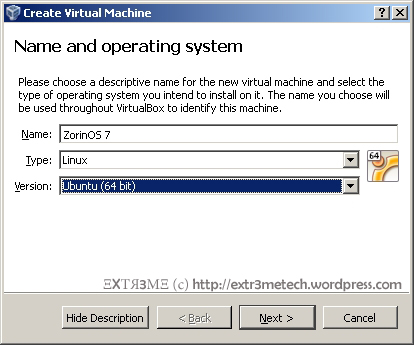
Now, enter “Name” anything as you wish, Type asLinux” and Version asUbuntu (64-bit)“. Then, click on “Next“.

Name and Operating system

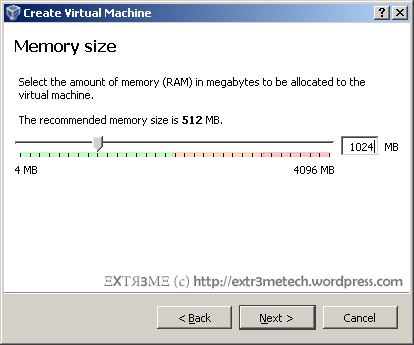
Now, select the amount of RAM you want to allocate for your Zorin OS Virtual machine. I would recommend a minimum of 512MB-1024MB. I have allocated 1024 MB (i.e. 1 GB of RAM) for my Zorin OS VM.

Memory Size

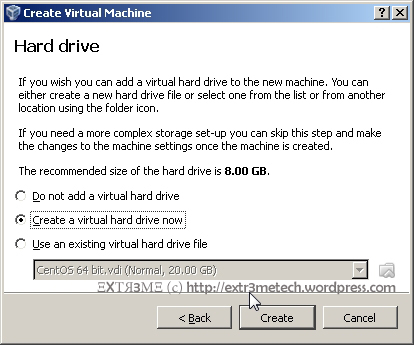
We need to create a virtual hard drive. Click on “Create a virtual hard drive now” and click on “Create“.

Create Hard Drive

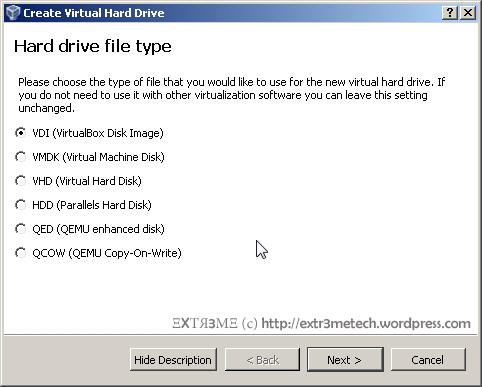
Now, select the option ” VDI(Virtual disk Image) ” and click on “Next”.

Hard Disk Type

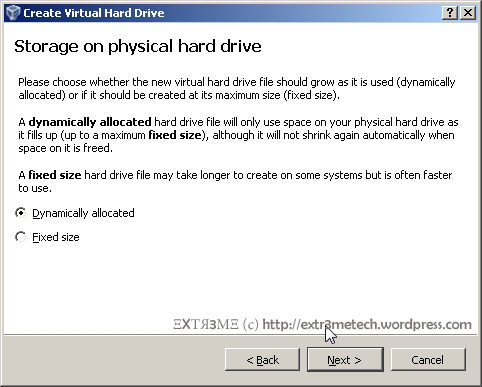
Now, select “Dynamically allocated“. {NOTE: You can also go with fixed size if you want but it will take longer time to create but is faster to use }

Storage Type

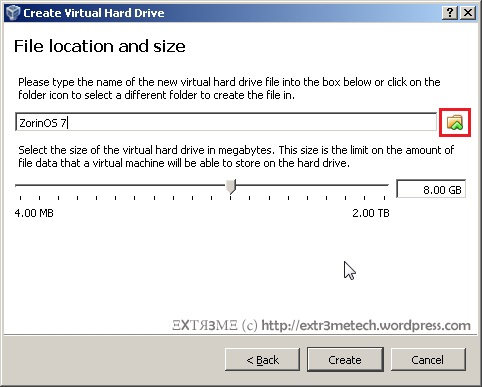
Now , you can select the size of your virtual hard disk by dragging the slider across. You can also choose a custom location where you want to save your Zorin OS by clicking on the red box that I have highlighted. Make sure you allocate a minimum of 8 GB. After selecting the appropriate options, click on “Create“.

7

Now, Click on the Virtual machine, you created and click on “Start“.

9

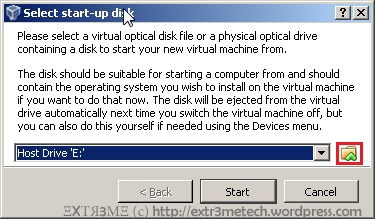
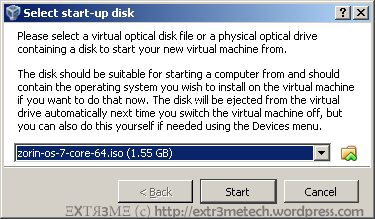
Now, click on the small folder icon which I have highlighted in red and browse to the ZorinOS ISO file you have downloaded earlier.

10

11

Now, click on “Start” once you have selected the ISO file.

12

To start the installation, select the option “Start the installer directly“.

13

Wait a few moments for the installer to load.

14

Select the Language of your choice and click on “Continue“.

15

Click on “Continue“.

16

Select “Erase disk and install Zorin“.

17

After this step, you would be prompted to select your location. You can click on the map to select your location and click on “Continue“. Then select the keyboard layout of your choice and click on “Continue“.

19

Now, you can enter “Your Name” , “Your computer’s name” , “username” and a “password” of your choice and click on “Continue“.

20a

Now, it will copy the nessasry files and install the Zorin OS.

21

This may take a while depending on your computer configuration.

23

You will get a prompt stating that the Installation is complete. Click on “Restart Now“.

24

Hit on the “ENTER” key when prompted.

25

Select the first option “Zorin” and hit “ENTER” in your keyboard.

26

This should boot up your installed Zorin OS.

27

Enter your login credentials that you created earlier during the installation phase.

28

You should be able to see your home screen and the Z button which is similar to the start button in Windows based systems in the lower left corner. Clicking that should bring up the menu which is very classy in my opinion and easy for newbies who are migrating from Windows to Linux.

30

You can open up the terminal by simply searching terminal in the search box and it should bring up the terminal.

31

And here is the terminal!

32a

So Hurrayy!! You have successfully installed Zorin OS in Virtual Box !!

I just installed ZorinOS a few days back, and felt that it is a great OS especially for users who are migrating from Windows to Linux. I am still playing around with it and so far I must say it looks interesting. So go ahead, try it out and let me  know what you think. Feel free to leave a comment about it in the comments section below.

If you have any sort of queries on regarding this installation, just leave a comment below and will get back to you. Don’t forget to follow my blog to get future updates! :D

 
ΞXΤЯ3МΞ
This is a guide on configuring network in CentOS 6.x in Virtual Box with screenshots (using terminal).

[UPDATE: This guide can also be used to configure network on CentOS 6.5]

So, here I have used CentOS 6.3 minimal and will be discussing on configuring the Virtual Box and CentOS for network access. If you need help installing CentOS minimal in the Virtual Box, you can find the instructions in my earlier post here.

Requirements:

  1. Virtual Box
  2. CentOS 6.3 or 6.5 (I have tested this on CentOS 6.3 and CentOS 6.5, you can use it on other 6.x versions too)

Step 1: Configure Virtual Box Network Settings:

There are different modes or ways you can configure your Virtual box network settings.

  1. Not Attached
  2. NAT
  3. Bridged Adapter
  4. Internal Network
  5. Host-Only Adapter
  6. Generic Driver

You can find more details about the different modes here.

I will be using the Bridged Adapter mode for this guide. It is faster as it treat the VM as an individual host within the network.

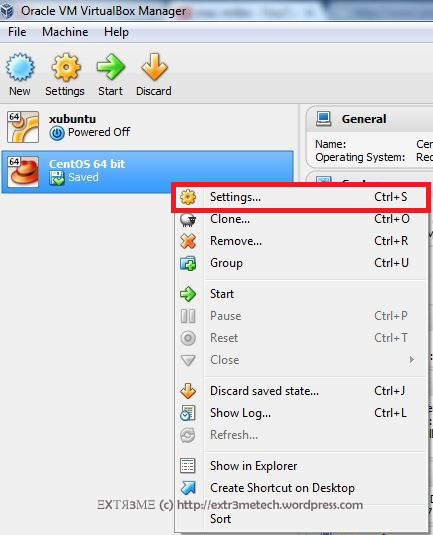
Open Virtual Box and right click on  your CentOS VM, and click on “Settings“.

vbox settings

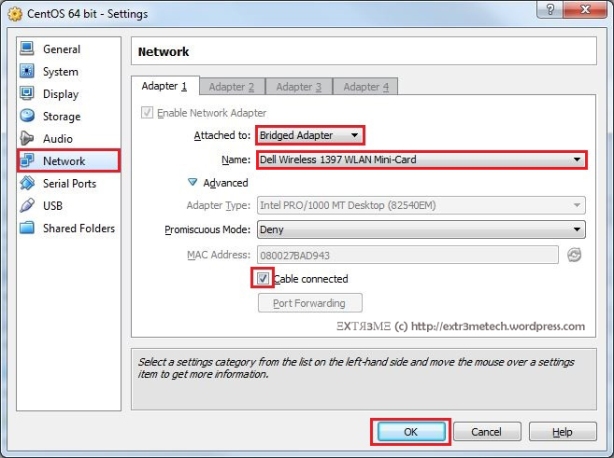
Now, go to the tab Network and change the “Attached to” field to “Bridged Adapter”. Then choose the “Name” to your network interface. For example, I have a dell wireless adapter, so I choose the Name as “Dell Wireless” from the drop down menu. And finally check the field “Cable Connected.  Finally, click on OK when you are done.

network settings

So, you have now configured the Virtual Box. Now, you can start your CentOS VM by selecting you VM and clicking on “Start”.

start vm

Step 2: Configure CentOS network settings:

You can configure your network either by using Dynamic IP addressing assigned by your DHCP server or you can manually configure your IP Address statically. You can choose either static or dynamic method and can do so by editing the file /etc/sysconfig/network-scripts/ifcfg-eth0.

Method 1: Dynamic IP 

We can configure the network by using Dynamic IP address which are assigned automatically by the DHCP server. This is the simplest way to configure your network.

NOTE: You will have a line that starts with HWADDR in the your config file, do not change or modify that line.

In your terminal, type the following:

vi /etc/sysconfig/network-scripts/ifcfg-eth0

Now, add/modify the file as follows (DO NOT CHANGE the HWADDR line your config file):

DEVICE=eth0

BOOTPROTO=dhcp

ONBOOT=yes

NM_CONTROLLED=no

HWADDR=08:00:27:08:47:E9

Now, save the file by pressing “ESC” and typing :wq and hit ENTER.

To view your network config file. type the following in the terminal:

cat /etc/sysconfig/network-scripts/ifcfg-eth0

dynamic ip config

Now, you will have to restart your network. You can do so by typing the following in the terminal:

                service network restart

service network restart

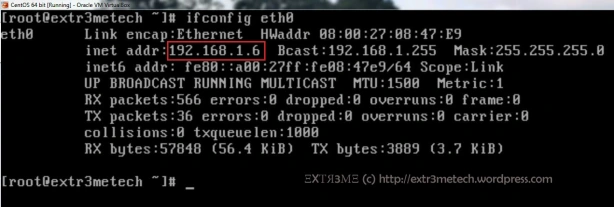
To view your IP address, type the following in your terminal:

                ifconfig eth0

You can see your IP Address of the interface eth0 next to the field “inet addr:” as shown below:

ifconfig eth0

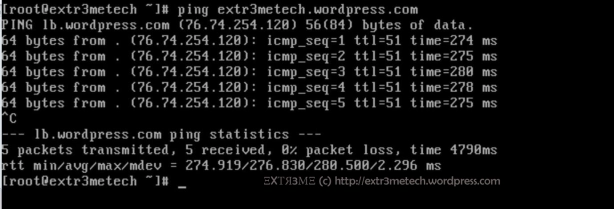
Now, if you have internet access, then you can check if you are able to ping any website. And you should be able to get the reply. For example, in your terminal type:

ping extr3metech.wordpress.com

ping results

You can press CTRL+ C to stop the ping command.

So, Hurray! you have successfully setup up your network in your CentOS Virtual Box.

Method 2: Static IP

We can also assign the network information manually by assigning the IP Address, NETMASK , GATEWAY in the network interface config file.

NOTE: You will have a line that starts with HWADDR in your config file, do not change or modify that line.

Step1 : In you terminal, type:

vi  /etc/sysconfig/network-scripts/ifcfg-eth0

Now, edit/merge the file to the following

DEVICE=eth0

BOOTPROTO=static

ONBOOT=yes

NM_CONTROLLED=no

HWADDR=08:00:27:08:47:E9

IPADDR=192.168.1.30

NETMASK=255.255.255.0

GATEWAY=192.168.1.1

Now, press ESC and type :wq and hit ENTER to save and exit the configuration file.

To view the config file. type the following in the terminal:

cat /etc/sysconfig/network-scripts/ifcfg-eth0

view configuration

Step 2: Change Host name: 

To change host name , you have to edit the config file /etc/sysconfig/network. If you want to know to change the host name manually, you can follow the guide I have posted earlier here.

Step 3: Assign DNS Server IP

To manually assign primary and secondary DNS Server IP addresses, in your terminal type: 

vi /etc/resolv.conf

Now, edit this file to the following:

nameserver 8.8.8.8          

nameserver 8.8.4.4

Now, press ESC and type :wq and hit ENTER to save and exit the configuration file.

Now, if you want you can make sure you have entered and saved the correct configuration(It is a good practice to double check 😀 ). To view your dns config file, in your terminal type:

cat  /etc/resolv.conf

/etc/resolv.conf

Step 4: Restart network:

Finally, all you have to do is to restart your network service. To so so, type the following in the terminal:

                service network restart

service network restart

Now, you can check your Current IP configuration, by typing the following in the terminal:

ifconfig eth0

ifconfig eth0

Now, if you have internet access, then you can check if you are able to ping any website. And you should be able to get the reply. For example, In your terminal type:

ping extr3metech.wordpress.com

 ping results

You can press CTRL+ C to stop the ping command.

So, Hurray! you have successfully setup up your network manually in your CentOS Virtual Box.

Hope this guide helped you to configure network in your CentOS Virtual Machine.

If you have any queries or suggestions regarding this guide, feel free to leave a comment and will get back at you. Don’t forget to follow my blog to get future updates! :D

ΞXΤЯ3МΞ


This is a guide to keep your computer secure against the Java attack. This post is on how to remove Java from your Windows 7 PC completely to keep your computer safe against any suck attacks. There are a lot of vulnerabilities with Java and is recommended that you remove java completely to keep your computer to be secure against any java exploits. Before you uninstall , you must know that uninstalling Java from your java may not allow some programs to run properly.

Step 1:

Click on the Start Button  (that looks like a flag usually in the left bottom corner of your screen) and click on “Control Panel”.

ctrl

Step 2 :

Now, click on “Uninstall a program” . (Note: If you don’t see a similar page like the one below, try to change the View in the top to “Category” )

menu

Step 3:

Now, type in “java” in the search box in the upper right corner. You will now see all the java components like the one below:

java list

Right click on each of them and click on “Uninstall” and it will remove Java from your computer.

Step 4:

To verify that java is active or not by going to http://www.java.com/en/download/testjava.jsp

Hope this helps! Subscribe to my blog to get more updates!

ΞXΤЯ3МΞ
I have just installed CentOS 6.3 64-bit (minimal)  in Virtual Box. This is how I installed CentOS in Virtual Box. Hope this helps.

[Update: The updated version of this article with screenshots for CentOS 6.7 can be found here.]

Requirements:

  1. CentOS 64-bit ISO : Download Link (~330 MB)
  2. Virtual Box : Download Link (~90 MB)
  3. Atleast 8 GB -of free disk space

Installation Procedure:

First, thing you need to  do is to set up your Virtual Box. Go ahead download and install Virtual Box (the download link is given above in the requirements).

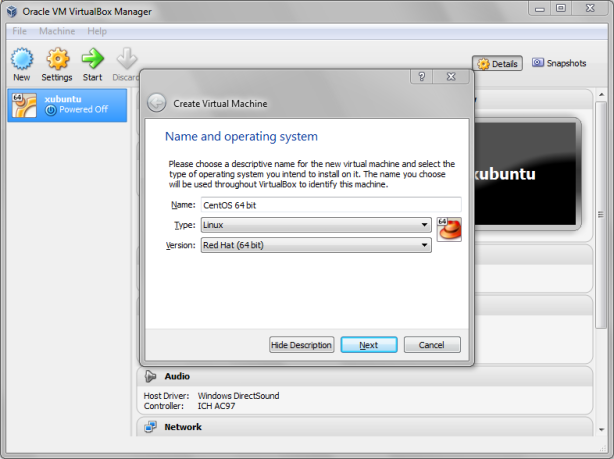
Press “New“, Type as “CentOS 64 bit” or anything you want. Set the type as “Linux“, Version as “Red Hat 64 bit“. And press “Next”.

Create VM

Allocate “Memory ” to 512 Mb or 1024 MB . You can increase this value according to requirements. And Press”Next“.

RAM

Then select “Create a virtual Hardisk Now” and press “Create“.

HD

Then choose “VDI” which is the first option, and press “Next“.

Hard Disk Type

Then choose “Dynamically allocated

Storage Type

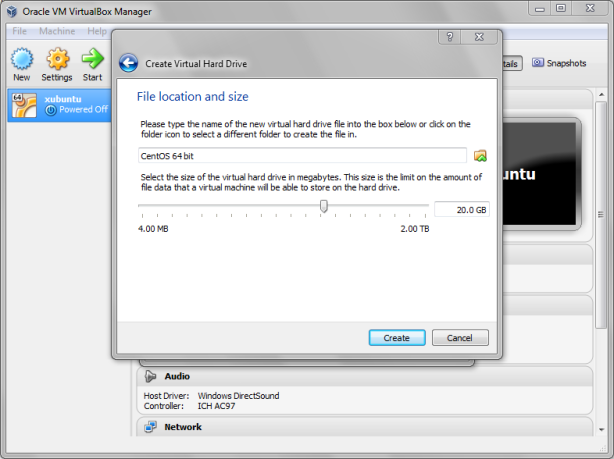
Choose the amount of hard disk space you want to allocate for your CentOS system. Select atleast 8Gb-10GB . I have allocated 20 GB. And press “Create“.

Hard Disk Size

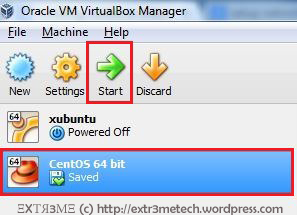
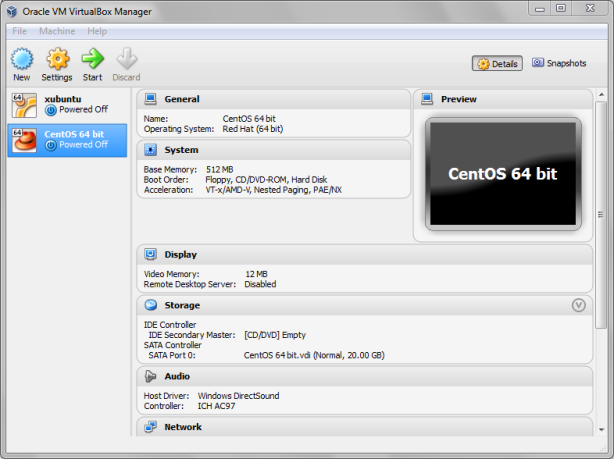
You would see the Virtual Box Home Screen. Now Press on “Start“.

start

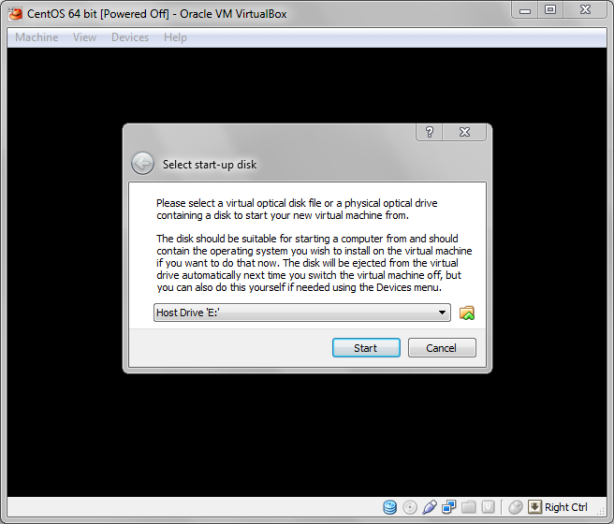
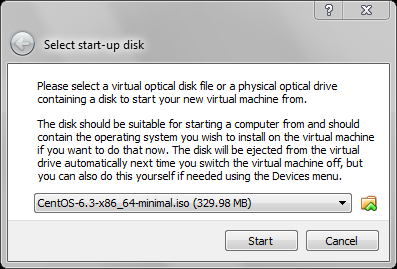
Then press the small folder icon and choose the CentOS ISO file you have downloaded  earlier. And then press “Start“.

Select ISO

selected iso

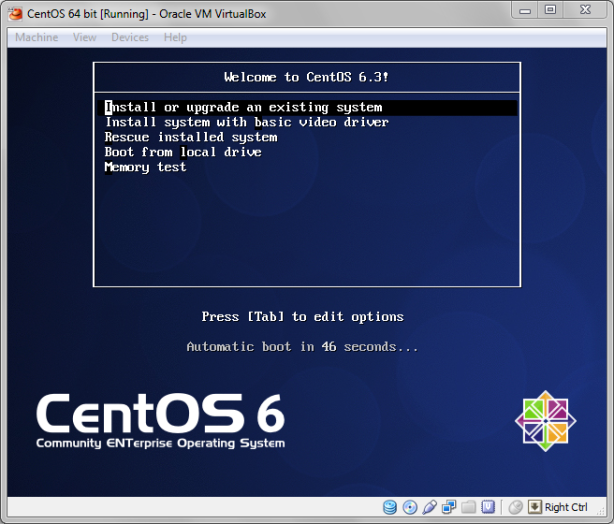
Wait for a few seconds and you will see the CentOS boot menu. Now, select the first option “Install or upgrade an existing system“. And press “Enter” in your keyboard.

Boot menu

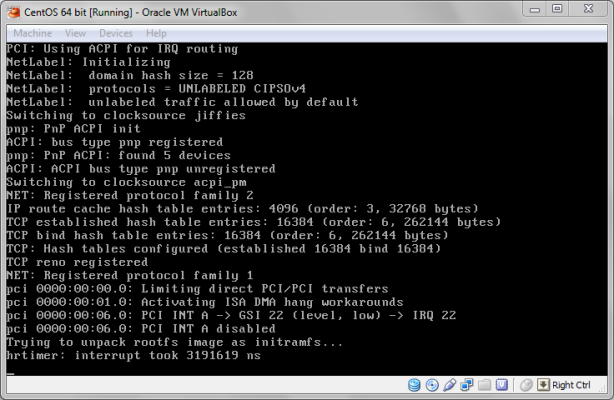
Now , it will take a few seconds to load.

loading

[Note: To scroll through different options, you can either use the Arrow keys in your keyboard or the TAB key to move through different options . You may also use SPACE bar in your keyboard or ENTER key to make selections]

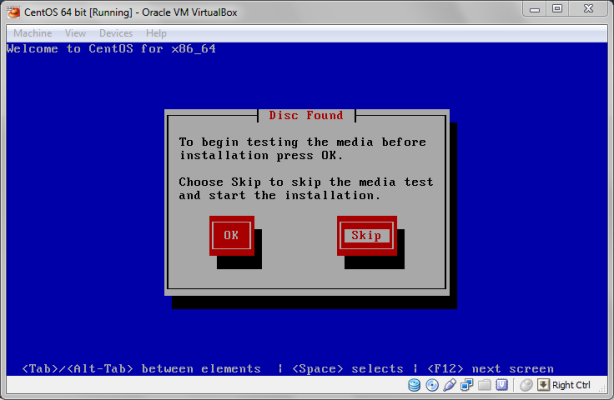
Now, you will probably get a message box saying “Disk Found” and if you want to verify the contents in the CD. Press “Skip” as you are installing from an ISO file. If you need, you can press “OK” and verify the contents but it might take a while.

Verify Or Not

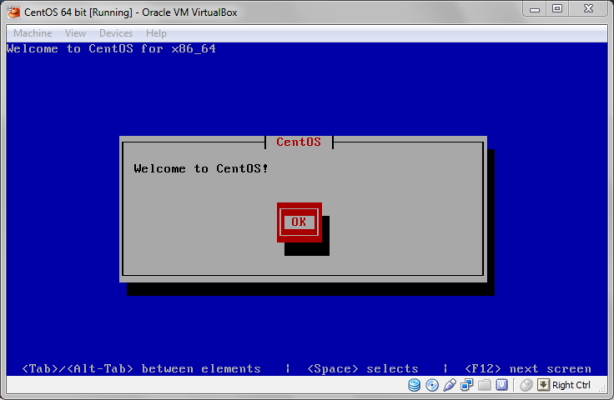
You would see a message “Welcome to CentOS” and then press “OK“.

Welcome Screen

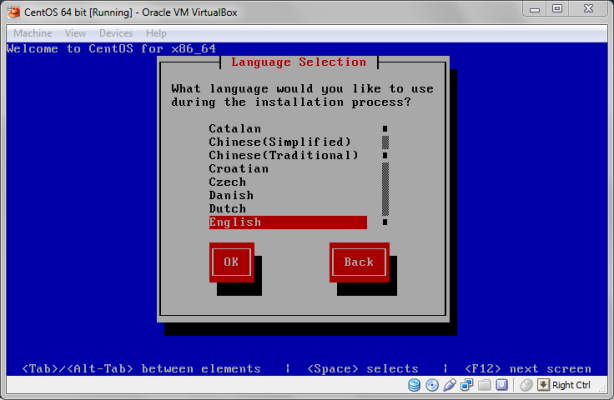
Select the language and press “OK“.

Language selection

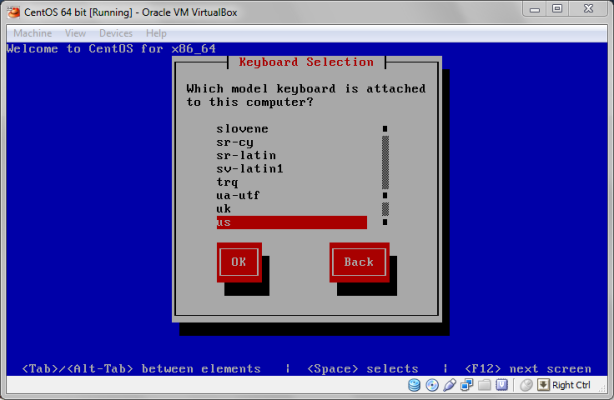
Select the model of the keyboard or just leave it to the default value. then press “OK“.

keyboard model

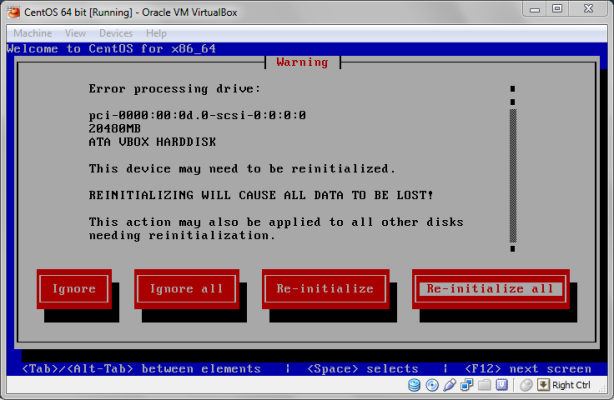
If you get a “Warning Message” such as the one below, just chooseRe-initialize all“.

Warning Message

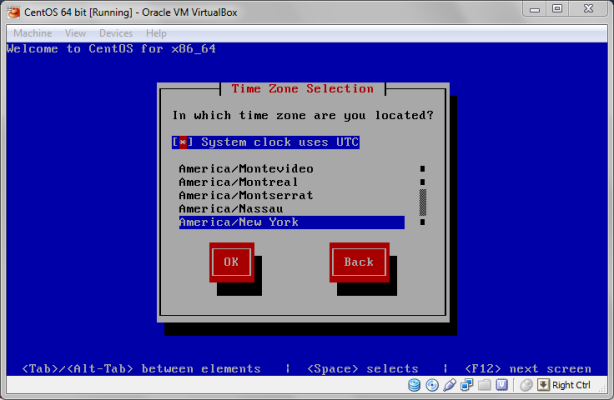
Then select your time zone and (Press TAB) and then  “OK“.

time

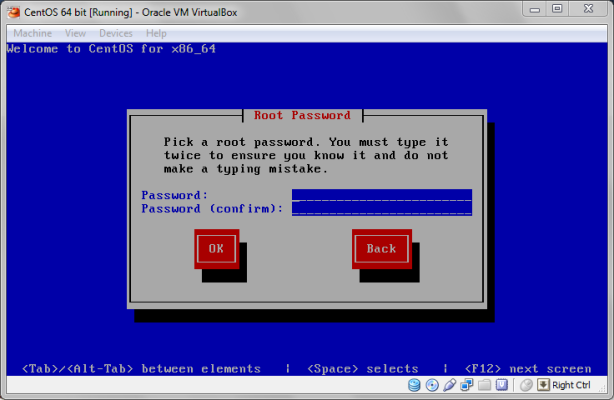
Now, you will need to enter a password. This will be the password for the root user (or Administrator password). Then select “OK“. {Remember you can use the arrow keys or TAB to move through different fields or options in the screen}.

set root password

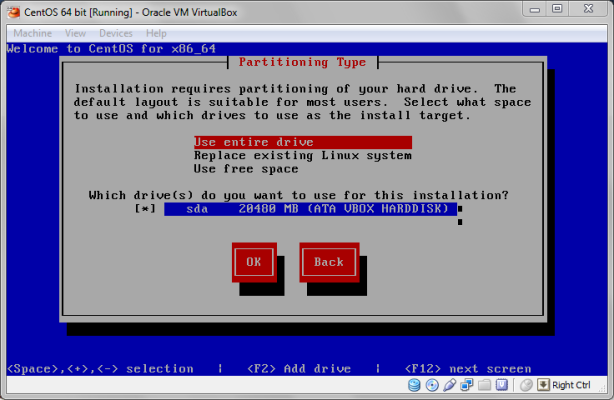
Now, select “Use entire drive” and then press “OK“.

Erase Disk

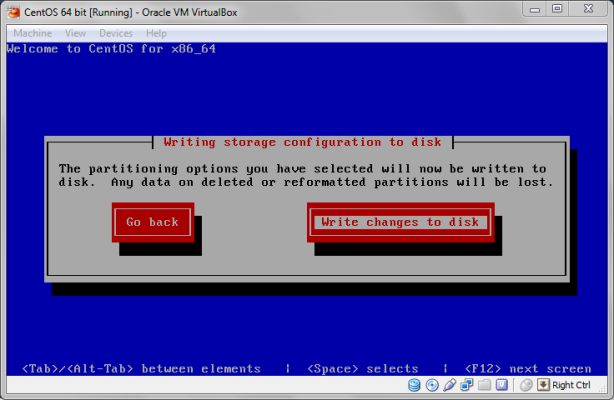
Now, press “Write changes to disk“.

write changes

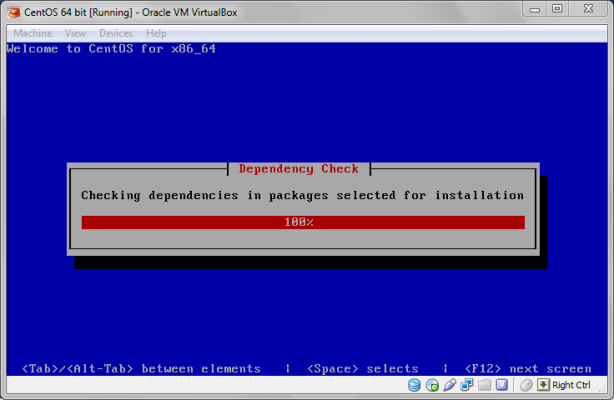
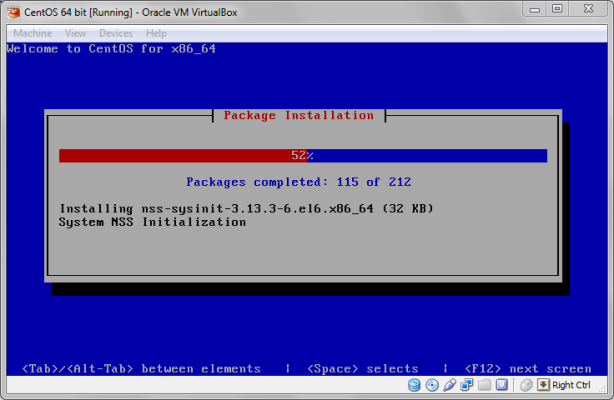
Now, it will begin installing CentOS. It might take a while for it to complete.

dependencies check

installing screen

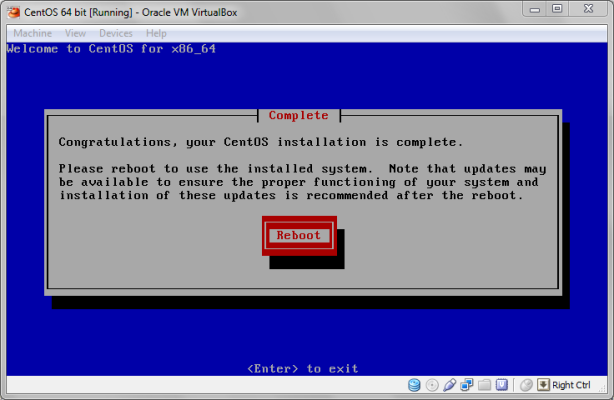
After, it is done installing , you will see a message saying “Congratulations, your CentOS installation is complete“. Select “Reboot” and hit ENTER.

Reboot

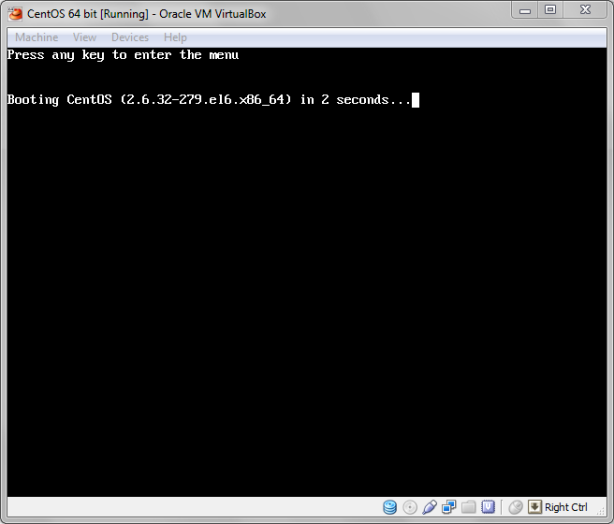
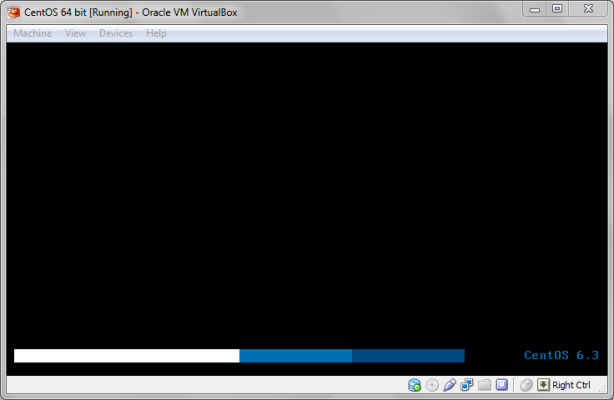
It will reboot now, and you will see the CentOS booting screen.

booting

CentOS booting

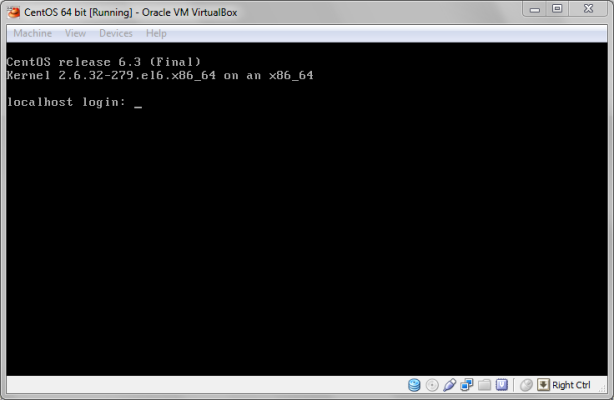
Now, you will see the login prompt as shown in the picture below. Now, Type the login as “root” and password as the password you entered during the setup.

login screen

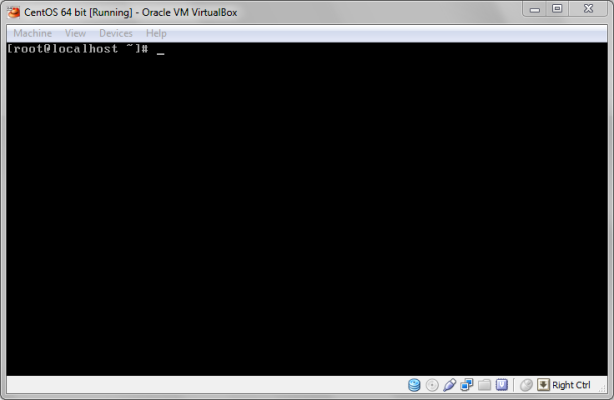
After successful login  you will see a prompt as shown below with  # symbol at the end.

Succesful login and root prompt

And voilà ! You have successfully installed CentOS in your Virtual Box.

This is a minimal mode CentOS and so many application packages are not installed. You will also have to configure the network to access the internet.

[UPDATE: To configure network in CentOS, I have made a detailed guide with screenshots, you can find it here.]

If you have any sort of queries on regarding this installation, just leave a comment and will get back at you. Don’t forget to follow my blog to get future updates! :D

ΞXΤЯ3МΞ